What better way to start a programming/technical/anything else blog than describing the journey to set it up?
TL;DR: I used Hugo and Netlify to create and deploy the blog and Namecheap.com to buy a cheap domain name.
A bit of history 
Since I started programming I thought about opening my personal blog. I kept procrastinating due to a lack of time, money, tools and knowledge. The rare occasions I looked for a solution I always ended up with half solutions or expensive options.
I found out about Netlify when it was still pretty plain,
don’t get me wrong it was great, but <sarcasm> it wasn’t enough for a man of culture such as myself </sarcasm>.
Recently (might varies between 1 month and 2 years) I found out about Hugo.
Hugo offers an easy and fast way to create static websites with the option to add a custom or preset theme.
Great! But I needed somewhere to deploy my site and all the available options were pricy or too complicated for young me.
Opening a blog in 2020 
Today nothing much has changed, I still lack the time and the money to invest in a blog.
On the other hand I discovered that Hugo and Netlify works perfectly together.
Though I still wasn’t happy with the default namespace Netlify gives you, canobbioe-netlify.com
is not really professional. Feeling a bit like a choosing beggar
I looked for a cheap domain registration service, to my surprise a website named namecheap.com
exists. I bought canobbioe.com for under 10€ (around 11$), yay!
How To 
It is time to get to the actual technical part. The first thing I’d like to do is listing which parts I have:
- Domain name
- A place to deploy my site
- A static webpage
Putting together the pieces is easier said than done but here’s how I did it:
- Installed Hugo extended
- Created my website from CLI:
$ hugo new site sitename - Picked a theme and added it as a
git submodule. - Pushed everything to GitHub
- Followed Hugo’s guide to deploy with Netlify
- Associated my newly bought domain to Netlify using its dashboard
- Selected
Custom DNSin theNAMESERVERsection underdomain list > manageon namecheap.com - Changed the domain’s nameservers to the ones listed by Netlify under the
DNS settingstab (see image)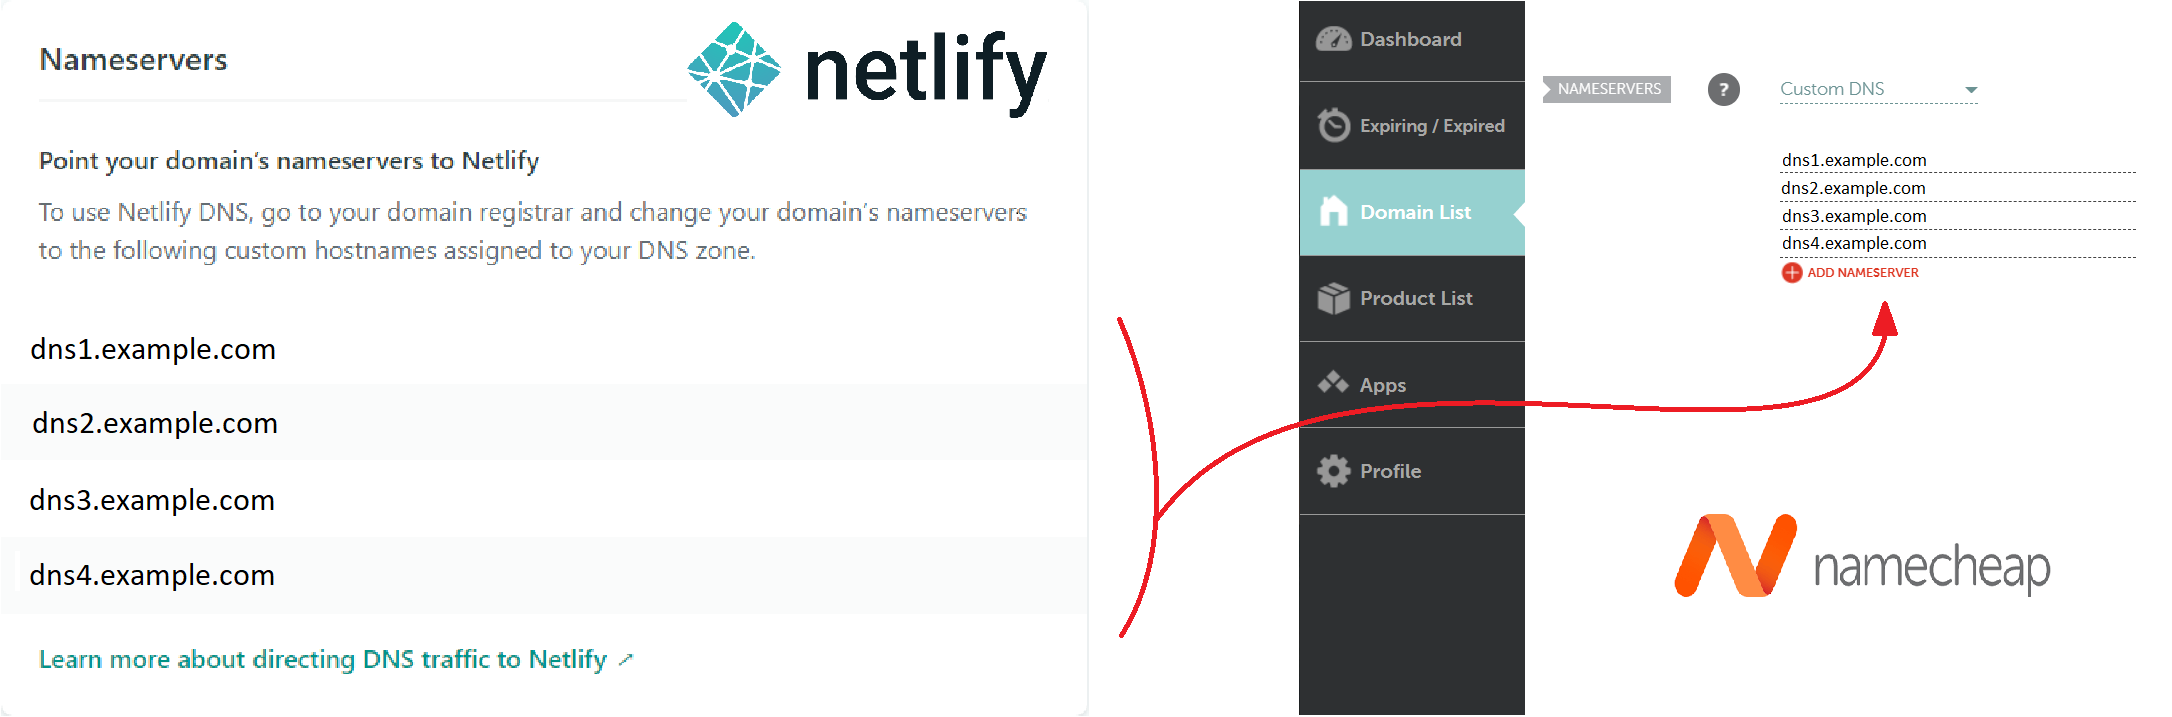
I could’ve just stop here, but it’s 2020 and we must use SSL. To set up HTTPS I just had to wait and wait and sometimes I even waited… Finally the DNS propagation was completed and Netlify took care of the rest.
I run into a problem while deploying the site with the Sam theme:
Transformation failed: POSTCSS: failed to transform "css/main.css" (text/css): resource "path/to/resource" not found in file cache. Check your PostCSS installation; install with "npm install postcss-cli". See https://gohugo.io/hugo-pipes/postcss/
The solution is written clearly in the error message: running “npm i -g postcss-cli autoprefixer” before building fixed the problem.
Conclusion 
This little adventure into the land of web hosting and static web pages taught me that <sarcasm> I was right all along: procrastinating what seems hard, eventually makes it easy! </sarcasm>